This webpage contains:
-
IVC Based Volume Assessment
-
DVT
-
Acute Limb Ischemia
****
IVC Based Volume Assessment: Highlights
- Probe & Positioning: Use a curviliear 3.5 -5 MHz transducer. Start sub-xyphoid. First find the IVC in cross section, then rotate 90 degrees to obtain a longitudinal view.
- Target Confirmation: Confirm that you are looking the IVC by scanning in two planes and noting an anechoic lumen which is easily compressed (the wink sign).
- IVC Measurement: Take measurements 2-3 cm inferior to right atrium at the level of the hepatic vein. Note that the IVC may dilated by the following: cirrhosis, right heart failure or valvular disease
- IVC diameter 1.5-2.5 cm: euvolemia likely
- IVC diameter >2.5 cm: fluid overload likely
- IVC diameter <1.5 cm: hypovolemia likely, especially if diameter is <1.0 cm
- Sniff Test: The IVC collapses during inspiration (especially during a strong sniff). Using M-mode may be helpful here. Have the patient take a forceful sniff while observing IVC diameter:
- >50% collapse: likely hypovolemic.
- <50% collapse: likely euvolemic.
- No collapse: likely hypervolemic
- Reassess: Obtain serial measurements of the IVC diameter to monitor response to volume resuscitation. Every 100 mL of volume should change the IVC diameter by approximately 1 mm
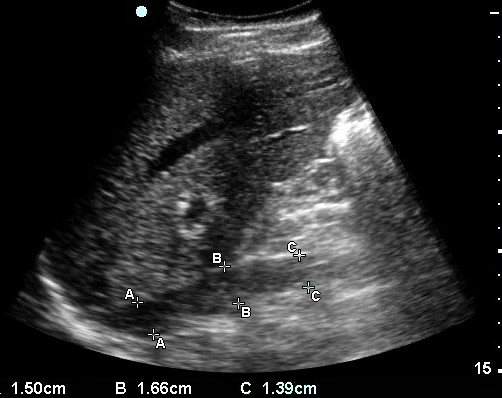
IVC behind liver with measurements at 3 levels, A, B & C
****
DVT & Limb Ischemia Ultrasound: Highlights
- Probe & Positioning: Use a high frequency linear array probe. Though not as sensitive as a formal duplex, a limited study scanning just below the femoral ligament and at the popliteal fossa is a good screening test for DVT.
- Target Confirmation: Veins and arteries often run side by side so try not to confuse them. Obtaining images in multiple planes and utilizing the contralateral side for comparison can be helpful
- Veins: Veins are thin walled and almond shaped and collapse with pressure from the ultrasound probe unless they contain a DVT. A “soft touch” is often required.
- Arteries: Arteries tends to be circular rather than almond shaped, have thicker walls and are relatively non-compressible. Use of Doppler should show triphasic flow in an unobstructed artery.
- Identifying a clot. A clot in the vein tends to have a similar echogenicity to liver. Clots make the vein partially or completely non-compressible. An arterial clot should cause loss of the normal triphasic arterial Doppler signal
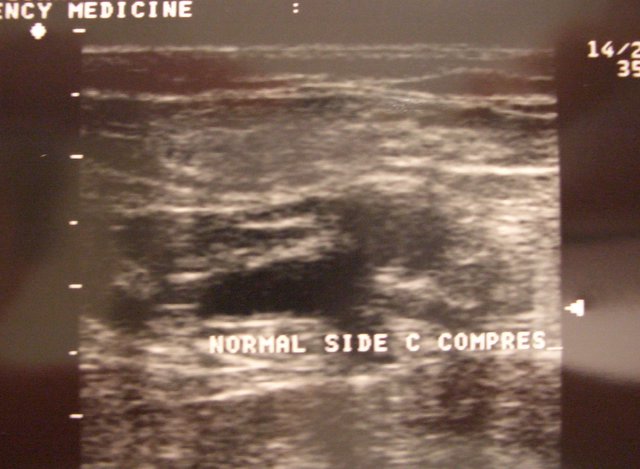
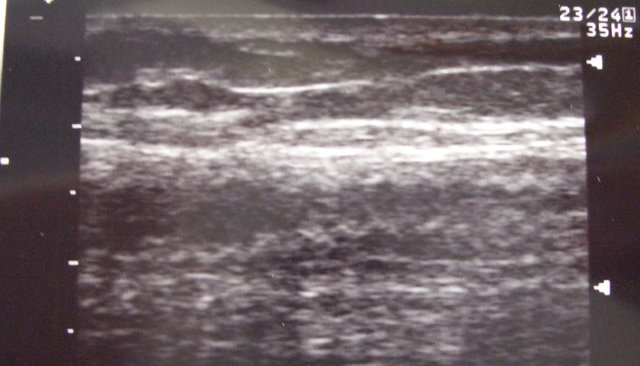
Normal Femoral Vein under Compression collapses
****
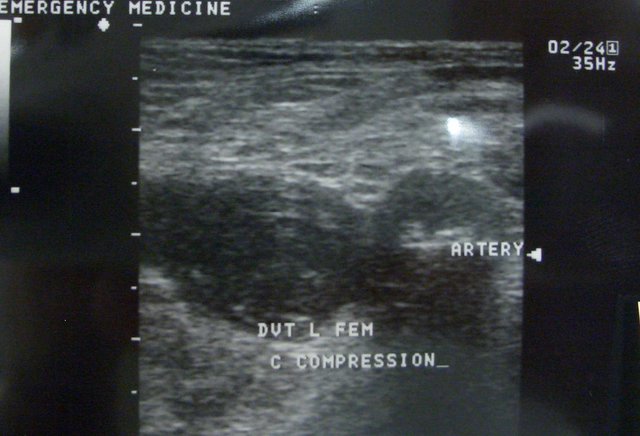
Femoral Vein DVT under Compression doesn’t collapse
****
DVT & Limb Ischemia Ultrasound: Details
- Probe & Positioning: Use a high frequency linear array transducer (10-13 MHz). Though not as sensitive as a formal venous duplex, a limited study scanning just below the femoral ligament and at the popliteal fossa is a good screening test for DVT.
- Target Confirmation: Veins and arteries often run side by side so try not to confuse them. In addition to the steps below that explain the difference between veins and arteries, obtaining images in multiple planes (longitudinal, transverse, oblique) and utilizing the contralateral side for comparison can help clarify the situation when there is any doubt.
- Veins: Veins are thin walled and almond shaped and collapse with pressure from the ultrasound probe unless they contain a DVT. In fact, your standard hold of the probe on the skin may be enough to compress the vein and make it non-visible until you let up the pressure. A “soft touch” is often required. Veins should distend with dependent positioning (reverse Trendelenberg) or a Valsalva maneuver. A vein should have non-pulsatile sluggish flow with use of Doppler. Remember, if you cannot see a vein in the expected location, try releasing probe pressure a bit.
- Arteries: Arteries tends to be circular rather than almond shaped, have thicker walls and are relatively non-compressible. Use of Doppler should show triphasic flow in an unobstructed artery. Although anatomic variations may occur, location is also important. For example, in the groin, the femoral artery is lateral and the vein medial. This knowledge however can lead you astray if your probe orientation is reversed. To check orientation, touch the probe with your fingertip while watching the screen. This should assure that your orientation on the screen is not reversed.
- Identifying a clot. A clot in the vein tends to have a similar echogenicity to liver, however more acute clots will be relatively darker than more chronic clots. Also remember that a clot may be non-occlusive, occupying only part of the vessel lumen. Clots make the vein partially or completely non-compressible. An arterial clot tends to be more hyperechoic (white) than venous clots. Since arteries tend to be non-compressible to start with, check for loss of the normal triphasic arterial Doppler signal which often occurs with partial arterial occlusion.
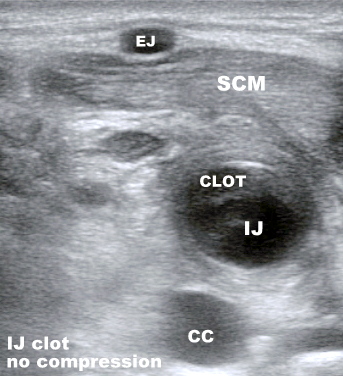


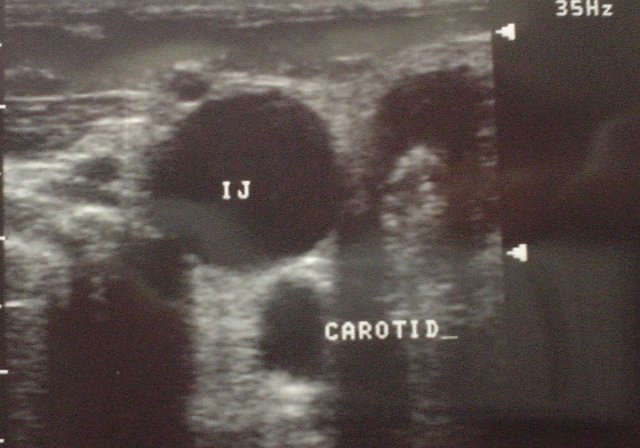
Clotted Internal Jugular Vein & Comparison View
****
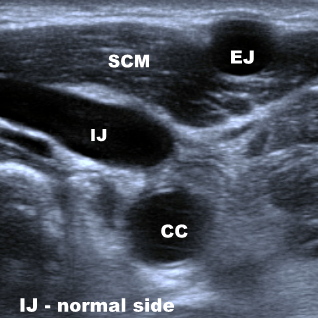
Normal anatomy of Internal Jugular Vein
****

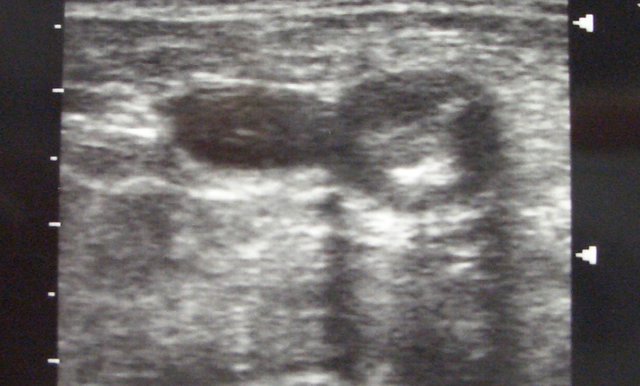
DVT in the Internal Jugular Vein from Central Line
****
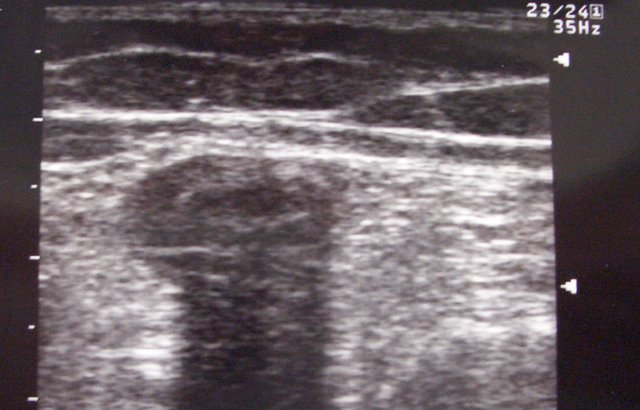
Femoral Arterial Thrombosis
****
Femoral Arterial Graft: 2 views
****
Effect of bedside ultrasonography on the certainty of physician clinical decision making for septic patients in the emergency department.
Ann Emerg Med. 2012; 60(3):346-358.e4 (ISSN: 1097-6760)
Haydar SA; Moore ET; Higgins GL; Irish CB; Owens WB; Strout TD
Maine Medical Center, Department of Emergency Medicine, Portland, ME.
STUDY OBJECTIVE: Sepsis protocols promote aggressive patient management, including invasive procedures. After the provision of point-of-care ultrasonographic markers of volume status and cardiac function, we seek to evaluate changes in emergency physician clinical decisionmaking and physician assessments about the clinical utility of the point-of-care ultrasonographic data when caring for adult sepsis patients.
METHODS: For this prospective before-and-after study, patients with suspected sepsis received point-of-care ultrasonography to determine cardiac contractility, inferior vena cava diameter, and inferior vena cava collapsibility. Physician reports of treatment plans, presumed causes of observed vital sign abnormalities, and degree of certainty were compared before and after knowledge of point-of-care ultrasonographic findings. The clinical utility of point-of-care ultrasonographic data was also evaluated.
RESULTS: Seventy-four adult sepsis patients were enrolled: 27 (37%) sepsis, 30 (40%) severe sepsis, 16 (22%) septic shock, and 1 (1%) systemic inflammatory response syndrome. After receipt of point-of-care ultrasonographic data, physicians altered the presumed primary cause of vital sign abnormalities in 12 cases (17% [95% confidence interval {CI} 8% to 25%]) and procedural intervention plans in 20 cases (27% [95% CI 17% to 37%]). Overall treatment plans were changed in 39 cases (53% [95% CI 41% to 64%]). Certainty increased in 47 (71%) cases and decreased in 19 (29%). Measured on a 100-mm visual analog scale, the mean clinical utility score was 65 mm (SD 29; 95% CI 58 to 72), with usefulness reported in all cases.
CONCLUSION: Emergency physicians found point-of-care ultrasonographic data about cardiac contractility, inferior vena cava diameter, and inferior vena cava collapsibility to be clinically useful in treating adult patients with sepsis. Increased certainty followed acquisition of point-of-care ultrasonographic data in most instances. Point-of-care ultrasonography appears to be a useful modality in evaluating and treating adult sepsis patients.
****
Do you want a pocket reference that has essential material on ED Ultrasound as well as other imaging, labs, EKG’s, procedures, risk management and more?
Then get the Tarascon Emergency Department Quick Reference Guide

****
WOULD YOU LIKE TO USE ONE OF OUR IMAGES?
As long as you paste the following statement with a weblink to this site, no problem: “Image reproduced with permission, ERPocketBooks.com”
****