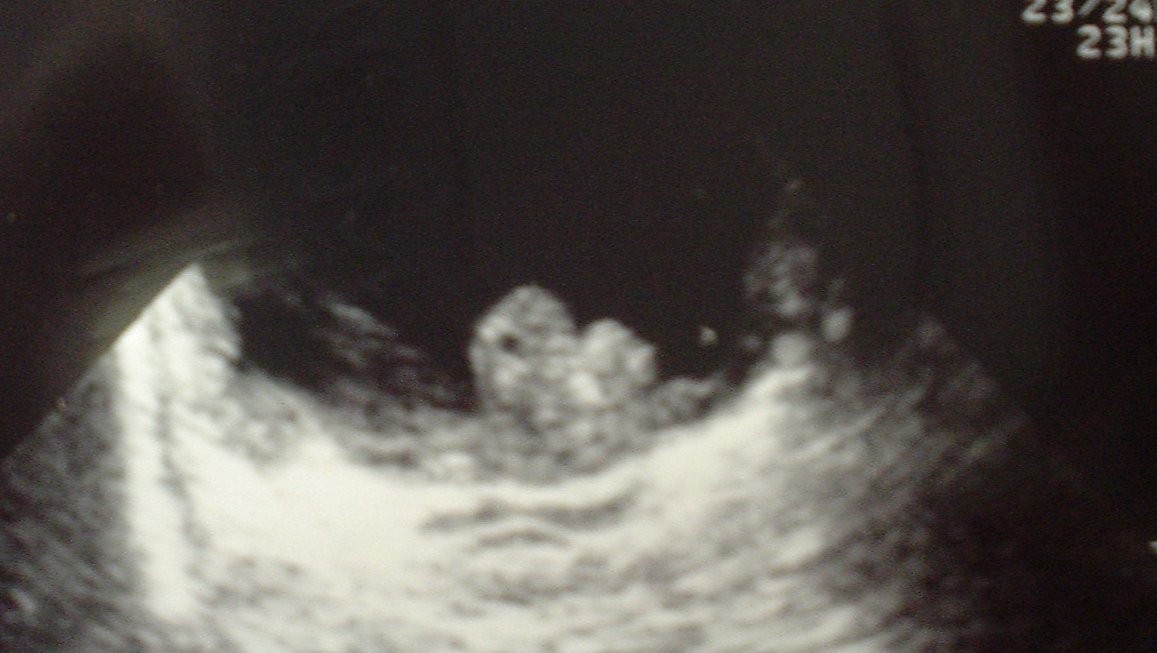
Normal Right Kidney
****
Renal Ultrasound: Highlights
- Probe & Positioning: Use a curviliear 3.5 – 5 MHz transducer. Start at the costal margin in the mid to posterior axillary line. For the right kidney, you can also image from the RUQ, using the liver as an acoustic window. Having the patient hold their breath can lower the kidneys enough that the rib shadowing doesn’t interfere.
- Target Confirmation: Image the entire organ using a fanning motion. Don’t just go for one pretty static shot through the middle.
- Look for the Hydro: Hydronephrosis is seen as a black or anechoic area in the center of the kidney and usually signifies a downstream obstruction.
- Compare Sides: Because most people have two kidneys, any questionable findings on one side may benefit from a comparison view of the other kidney.
- Check the Aorta: An aortic aneurysm often mimics renal colic, so always take a look at the aorta, even if your suspicion is low, because it is important to practice.
- Don’t Have Tunnel Vision: Sometimes important findings may adjacent to but not actually part of the organ you are focusing on.
- Imaging in Urosepsis: Don’t miss renal obstruction in the setting of urosepsis as relieving the obstruction is a critical part of treatment.

Normal Right Kidney
****

Normal Left Kidney
****
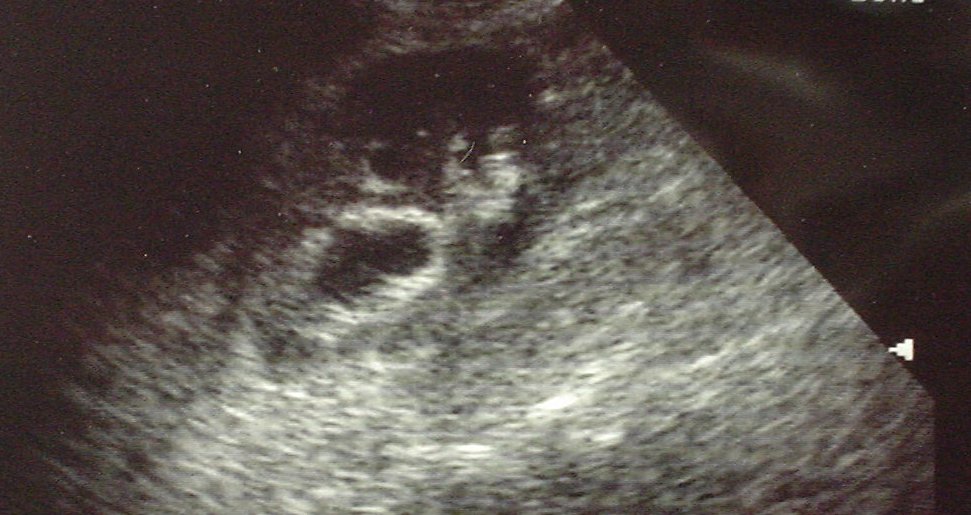
Painless hydronephrosis, unsuspected, in a patient with urosepsis
****
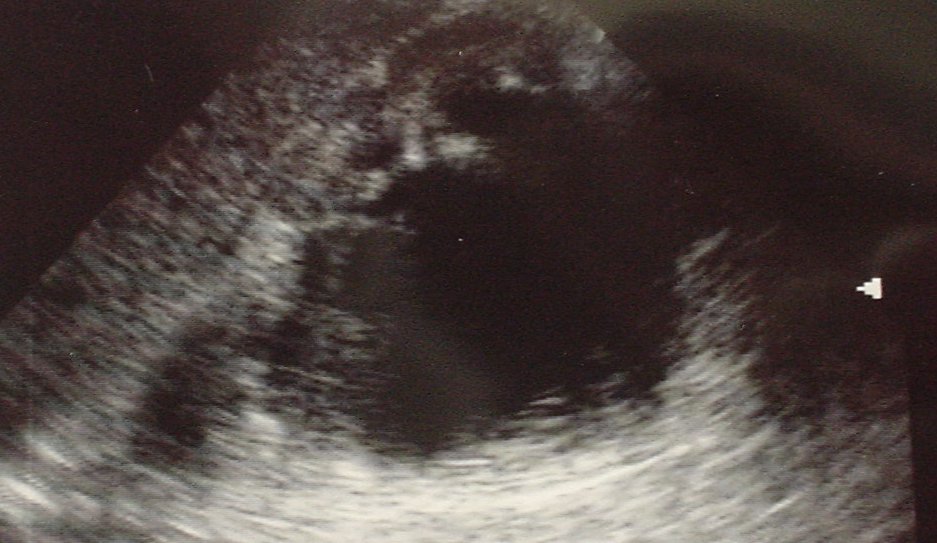
Massive Hydronephrosis: Congenital and asymptomatic
****
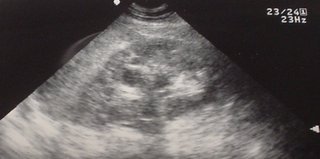
Hydronephrosis with Intra-renal Caliculi
****
Renal Ultrasound: Details
- Probe & Positioning: Use a curviliear 3.5 MHz or 5 MHz transducer to obtain the images of deeper structures like the kidneys. Start at the costal margin in the mid to posterior axillary line. For the right kidney, you can also image from the RUQ, using the liver as an acoustic window. Having the patient hold their breath can lower the kidneys enough that the rib shadowing doesn’t interfere.
- Target Confirmation: Image the entire organ using a fanning motion. Don’t just go for one pretty static shot through the middle. By being thorough you are more likely to pick up pathology. Pay attention to the entire ultrasound screen as you scan.
- Look for the Hydro: Hydronephrosis is seen as a black or anechoic area in the center of the kidney and usually signifies a downstream obstruction.
- Compare Sides: Because most people have two kidneys, any questionable findings on one side may benefit from a comparison view of the other kidney.
- Check the Aorta: An aortic aneurysm often mimics renal colic, so always take a look at the aorta, even if your suspicion is low, because it is important to practice looking a normal anatomy. Of course it’s even more essential to pick up an aneurysm before it ruptures.
- Don’t Worry about Details: During an ED ultrasound it’s not necessarily your job to find the stone itself or to look for ureteral jets into the bladder. Concentrate of looking for hydronephrosis.
- Don’t Have Tunnel Vision: Sometimes important findings may adjacent to but not actually part of the organ you are focusing on. Any abnormal findings that you are uncertain about should be confirmed with formal imaging, but this can often be done as an outpatient.
- Imaging in Urosepsis: Don’t miss renal obstruction in the setting of urosepsis as relieving the obstruction is a critical part of treatment. These patients may have little to no pain if they are elderly and/or the obstruction has become chronic. Be especially suspicious for obstruction if the patient does not have any other risk factor for UTI.

Polycystic Kidney Disease
****
Bladder & Prostate Ultrasound: Highlights
- Probe & Positioning: Use a curviliear 3.5 – 5 MHz transducer. Start with your probe just above the symphysis pubis and aim slightly inferiorly initially in case the bladder is decompressed.
- Target Confirmation: Urine in the bladder will appear dark black (anechoic) and there will usually be some degree of hyperechoic posterior enhancement behind the bladder
- Bladder Volume = (A)(B)(C)/2: To estimate the bladder volume, measure its diameter in 3 planes and divide the product by 2. A normal post-void residual urine should be less than 50-100ml.
- Finding the Prostate gland: The normal prostate gland is hypoechoic (gray) and is located deep and inferior to the bladder (see image). It is usually round or apple-shaped.
- Prostate Size = (A)(B)(C)/2 or (A)(A)(C)/2: The normal prostate size is ~ 20 grams or 20cc in a young male and 30 grams in an older male. Urinary retention is rare if the prostate is under 40 grams.
- Finding a Foley Balloon: The balloon has a hyperechoic rim and a hypoechoic center unless someone fills it with air. An internal echo within the balloon due to the tubing can usually be seen.
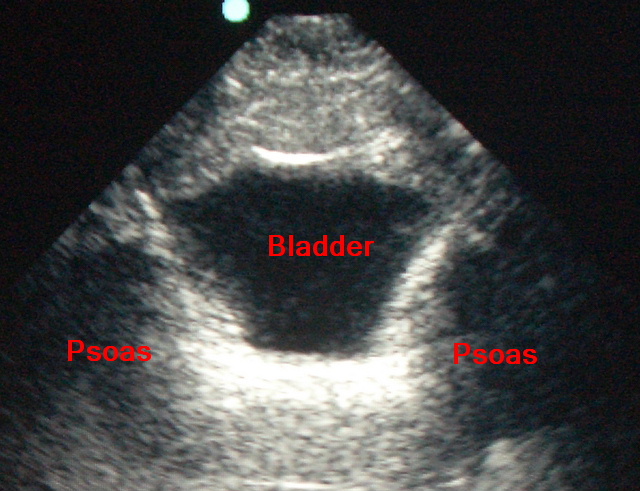
Normal Bladder
****
Bladder & Prostate Ultrasound: Details
- Probe & Positioning: Use a curviliear 3.5 MHz or 5 MHz transducer to obtain the images of deeper structures like the bladder. The urinary bladder is located in the pelvis, but with retention may protrude into the lower abdomen. Start with your probe just above the symphisis pubis and aim slightly inferiorly initially in case the bladder is decompressed.
- Target Confirmation: Image the entire organ using a fanning motion. Don’t just go for one pretty static shot through the middle. By being thorough you are more likely to pick up pathology. Urine in the bladder will appear as an area of dark black fluid (anechoic) and there will usually be some degree of hyperechoic posterior enhancement behind a fluid filled structure such as the bladder (see image).
- Bladder Volume = (A)(B)(C)/2: Post-void residual bladder volume should be measured immediately after the patient completes a spontaneous void. Remember that the bladder is not a simple structure like a sphere or cube. To estimate the bladder volume, measure the bladder diameter in 3 planes (height, width, depth) and divide the product of these 3 measurements by 2. Bladder volume = A x B x C/2, or A x B x C x 0.5 where A, B and C are the height, width and depth. A normal post-void residual urine should be less than 50-100ml. Be aware that some experts recommend different formulas for estimating volume with values up to A x B x C x 0.75. Many ultrasound machines will have preset formulas and programs that estimate bladder volume for you. Simply enter the height, width, and depth measurements you obtained, and the computer will calculate the volume in mL’s for you.
- Finding the Prostate gland: The normal prostate gland is hypoechoic (gray) and is located deep and inferior to the bladder (see image). It is usually round or apple-shaped and may have minor internal irregularities and occasionally calcifications that may produce an acoustic shadow.
- Prostate Size = (A)(B)(C)/2 or (A)(A)(C)/2: The normal prostate size in a young male is approximately 20 grams or 20cc which correlates to two finger-breadths or less. In an older male a normal prostate size is approximately 30 grams. Urinary retention is rare if the prostate is under 40 grams and degree of urinary symptoms tends to correlate with size. However, this is not always true. If you assume the density of the prostate is similar to water then the size of the prostate is approximately equal to its volume
- Finding a Foley Balloon: The Foley balloon should be in the center of the bladder. Once the bladder has drained all you usually see is the balloon as the walls of a decompressed bladder can be difficult to distinguish from surrounding structures. The balloon has a hyperechoic rim and a hypoechoic center unless someone accidentally fills it with air. An internal echo within the balloon due to the tubing as it runs through can usually also be seen on ultrasound. Ultrasound can be used to watch inflation of the Foley balloon in real-time to make sure the balloon is not being inflated too proximally in the prostate or urethra.
Bladder Tumor
****

Enlarged Prostate
****

Enlarged Prostate – sagital
****
Do you want a pocket reference that has essential material on ED Ultrasound as well as other imaging, labs, EKGs, procedures, risk management and more?

Then get the Tarascon Emergency Department Quick Reference Guide by Dr. Pregerson
****
WOULD YOU LIKE TO USE ONE OF OUR IMAGES?
As long as you paste the following statement with a weblink to this site, no problem: “Image reproduced with permission, EMresource.ORG“
****