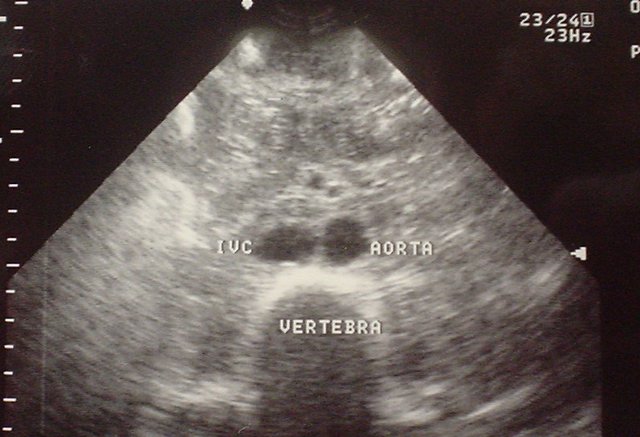
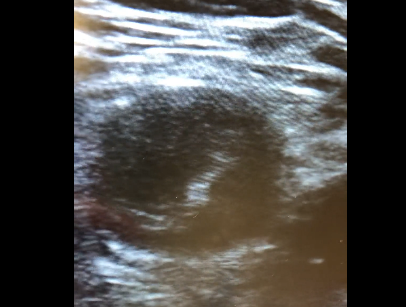
Normal Aorta with labels: Transverse
****
Normal Aorta & Aortic Ultrasound Basics
- Getting Started: Place the probe in a transverse fashion just below the xiphoid process. Remember, the abdominal aorta extends from the xiphoid to the umbilicus.
- Getting Oriented: Find the large, hyperechoic vertebral body casting a dark acoustic shadow, the thin-walled IVC anterior to the spine on the patient’s right, and the non-compressible, pulsatile, round aorta anterior to the spine on the patient’s left. When in doubt try Doppler or color-Doppler.
- Visualize the Entire Aorta: Once you find the aorta, maintain a transverse view and begin scanning down the entire length of the aorta from the xiphoid to the umbilicus where it should eventually bifurcate. If your view is obstructed try gentle pressure. View the entire aorta in both the transverse and longitudinal planes.
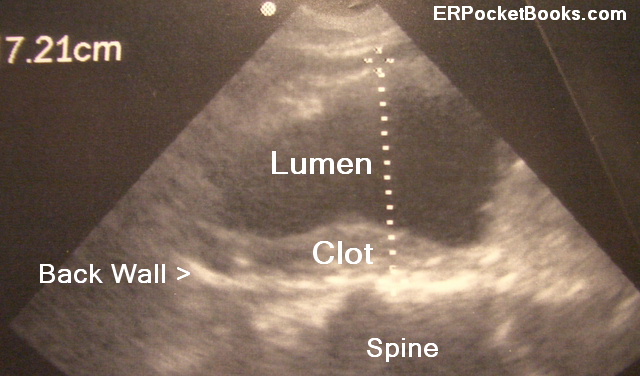
- Measuring Big Red: Take your measurements in the transverse plane, outer wall to outer wall. Normal diameter is up to 2cm with distal tapering. An aneurysm is defined as a diameter >3cm or lack of tapering. Intraluminal clot will appear hypoechoic with a mixed density similar to that of the liver.
Normal Aorta in Transverse
****
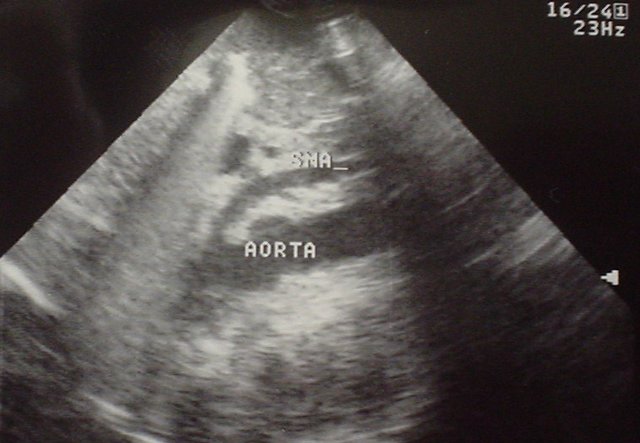
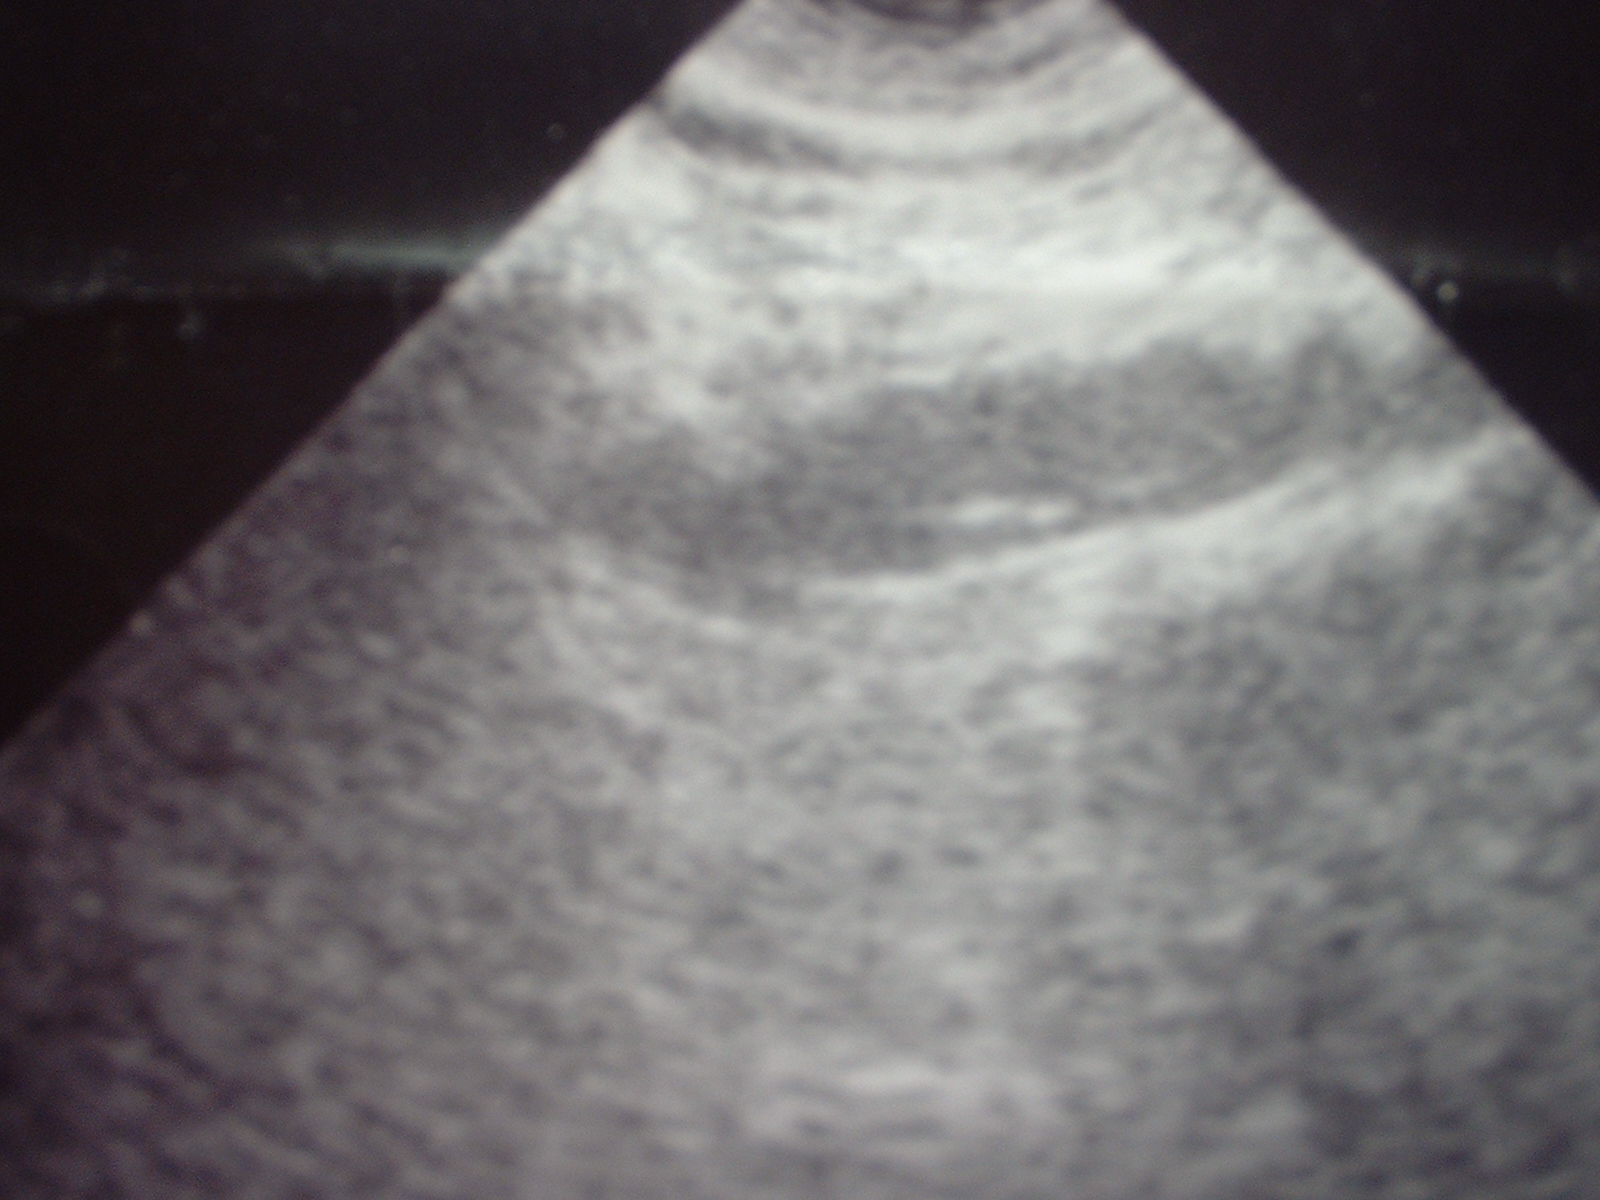
Normal Aorta in Longitudinal (SMA = Superior Mesenteric Artery)
.
TAD: THORACIC AORTIC DISSECTION
- Start with the Abdominal Aorta: Since most dissections, about 90%, will progress into the abdominal aorta and usually into at least one leg, start scanning in an area where you are familiar by looking for a hyper-echoic flap in the abdominal aorta. The false lumen may or may not be clotted off. Vessel wall and flap should appear hyperechoic (white), liquid blood should appear anechoic (black) and clotted blood should appear echoic (grey). A vascular flap within the abdominal aorta will usually move with each pulse if the false lumen has not clotted off. A vascular flap will not extend beyond the inner wall of the aorta. If it does, it is likely an artifact.
- Next Look at the Heart: Check the sub-xyphoid and parasternal views for evidence of a pericardial effusion and if present, evidence of tamponade. Remember free flowing blood will appear black but clotted blood will appear gray and therefor may be missed if you are not looking for it.
- Third, Look behind the Heart: Look at the descending thoracic aorta behind the heart. On the parasternal long axis view it will be seen in cross-section as a circle which normally should be less than 42mm in diameter. Rotate into the plane of the aorta to get a long axis view as you continue to check for a flap and any enlargement.
- Finally Check the Aortic Arch: Using the smallest probe you have, place it in the suprasternal notch to get a supra-sternal view of the aortic arch. Have the patient turn his or her head to the right and orient your probe in the plane of the aortic arch. With aortic dissection there is often some aneurysmal dilation which will make the aorta easier to visualize than in a normal patient. Again look for an intimal flap
- Keep up your Skills: Consider a quick bedside echo in chest pain patients where there is some suspicion for dissection. If you do see a dissection or a pericardial effusion the heightened urgency it gives you may mean the difference between a good outcome and a bad one.
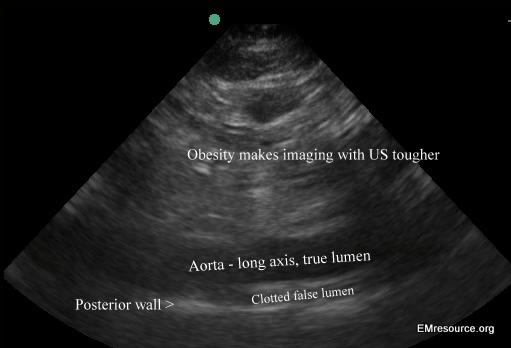
Abdominal aorta in a Type I dissection with a clotted off false lumen. Clot appears grey. Aortic wall and flap appear whiter.
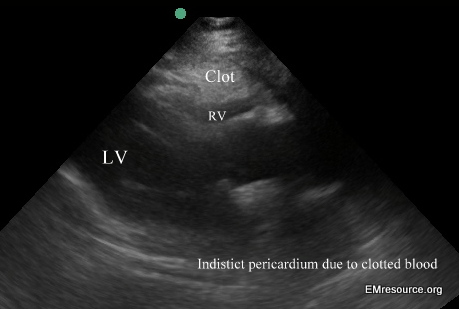
Pericardial hemorrhage compressing right ventricle (RV) from aortic dissection

Dissection: transverse abdominal level
****
DISSECTION INTO FEMORAL ARTERY VIDEO: CLICK HERE
****
Dissection: longitudinal at level of abdomen
****
Dissection: suprasternal view of dilated aortic arch with flaps
****
Dissection: transverse at level of abdomen
****
AAA: Abdominal Aortic Aneurysm
- Getting Started: Use the curvilinear 2.5 to 3.5 MHz transducer on most patients. Remember that lower frequency transducers enable better visualization of deeper structures. Place the probe in a transverse fashion just below the xiphoid process with the probe indicator directed towards the patient’s right. Make sure the indicator dot on the ultrasound screen is oriented to the left side of the projected image. Remember, the abdominal aorta extends from the xiphoid to the umbilicus. Another occasional error is trying to find the aorta below the umbilicus.
- Getting Oriented: In the transverse view, orient yourself by finding three distinct landmarks: the large, hypoechoic vertebral body casting a dark acoustic shadow farfield (posterior), the compressible, thin-walled, oval-shaped IVC nearfield (anterior) to the spine on the patient’s right, and the non-compressible, pulsatile, round aorta nearfield (anterior) to the spine on the patient’s left. Mapping out surrounding anatomical structures will minimize chances of misinterpreting the images obtained. Take your time and make sure you know exactly what you are visualizing on the screen. Obtain an image of the aorta in relationship to the vertebral body so you don’t confuse one for the other. Do not mistake a fluid-filled loop of bowel to be an enlarged aorta. Make sure the round, hypoechoic structure you think is the aorta doesn’t demonstrate any peristaltic movements on ultrasound. When in doubt, you can always apply color-Doppler. Remember that the aorta will demonstrate pulsatile flow, whereas the IVC will show a low flow rumble of color. Another option is to activate the regular Doppler mode and place the cursor within the structure you think is the aorta. If you are correct, you should be able to hear and see a tri-phasic arterial flow pattern.
- Visualize the Entire Aorta: Once you find the aorta, maintain a transverse view and begin scanning down the entire length of the aorta from the xiphoid to the umbilicus where it should eventually bifurcate. Visualize the aorta running directly anterior/nearfield to the spine along the length of the scan. As you scan inferiorly, bowel gas may intermittently occlude your view. Apply gentle pressure to displace the bowel to the left or right until you can clearly visualize the aorta again. View the entire aorta in both the transverse and longitudinal planes.
- Measuring Big Red: Take your measurements in the transverse plane, outer wall to outer wall. Obtaining measurements in the longitudinal view may lead to underestimation of the diameter if the aorta is visualized tangentially. Normal diameter is up to 2cm with distal tapering. An aneurysm is defined as a diameter >3cm or lack of tapering. Any sized aneurysm in a symptomatic patient is a potential emergency. In an asymptomatic patient, elective surgery is usually considered once the diameter exceeds 5cm. Intraluminal clot will appear hypoechoic with a mixed density similar to that of the liver. Vascular calcifications will appear bright white and hyperechoic. Do not be misled by these findings during measurement of the aortic diameter.
- Avoiding Pitfalls: The best way to avoid errors is through experience, so image lots of normal aortas, even when you are using the machine for other indications. Don’t mistake a vertebral body, the IVC or fluid filled loops of bowel for the aorta. When imaging, be alert for saccular aneurysms. They can be missed because they me be quite short or may even diverticulate off the main aorta.
- Practice Makes Perfect: With bedside ultrasound, there is no substitute for experience. The more scans you do, the better you will be able to differentiate abnormal from normal, even when you may not be sure exactly what the abnormality is.
****
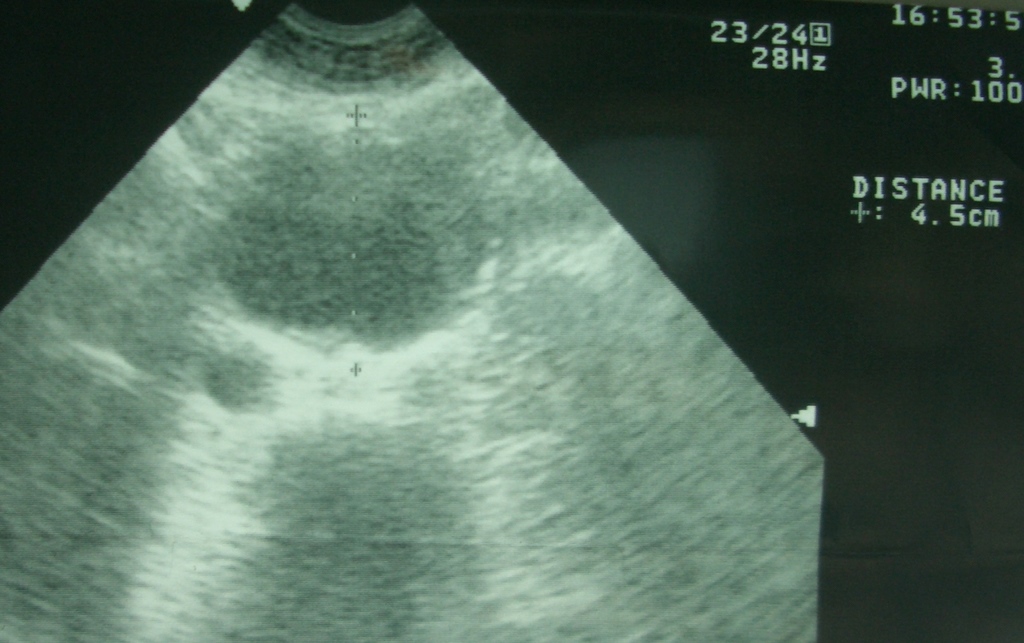
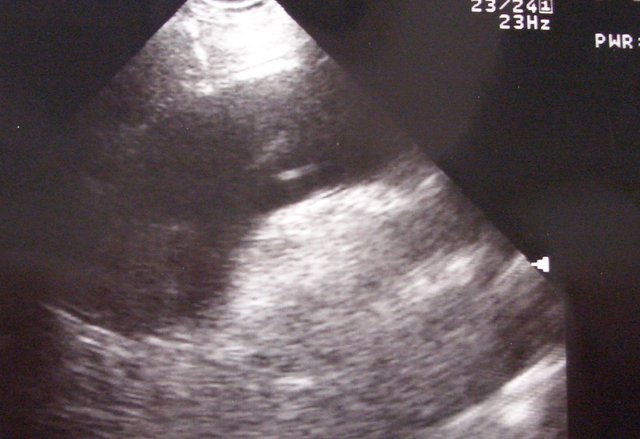
4.5cm AAA with spine & normal IVC
***
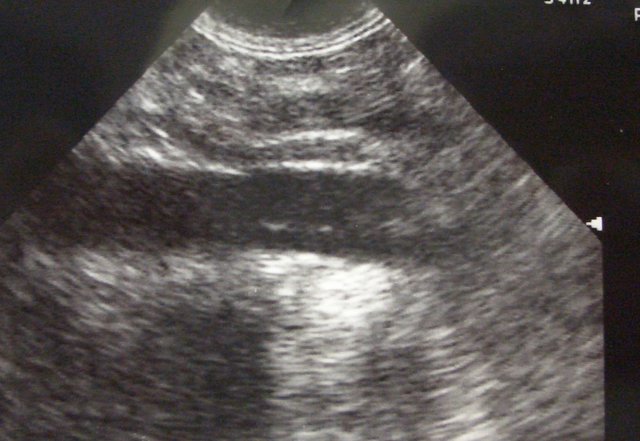
AAA: Long
****
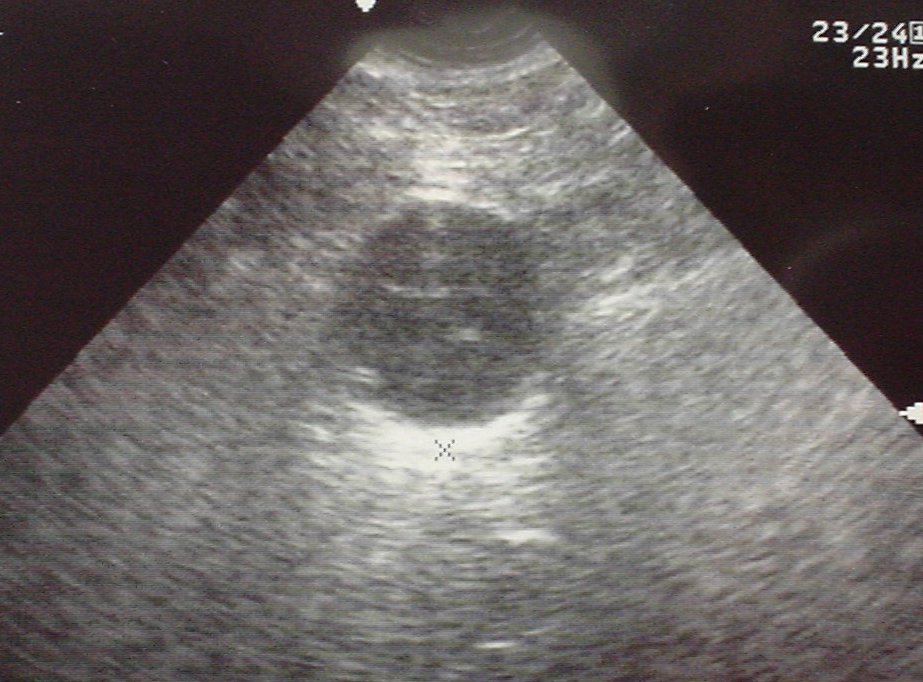
AAA: Transverse
****
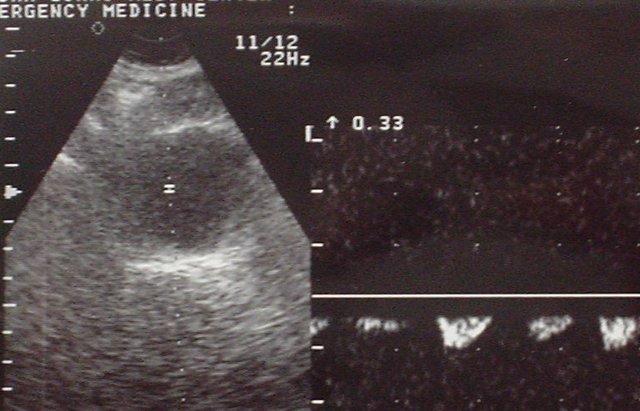
TRICK: For difficult Aorta Localization use the Doppler/B-mode split screen.
(AAA Transverse on left. Doppler pulse wave on right.)
****

****
WOULD YOU LIKE TO USE ONE OF OUR IMAGES?
As long as you paste the following statement with a weblink to this site, no problem: “Image reproduced with permission, ERPocketBooks.com”
****